Are you tired of filling in your eyebrows with a pencil every single day, just to get that little bit of extra definition? It feels like a never-ending routine, doesn't it? Well, imagine waking up with brows that already look rich and defined, ready to go without any extra effort. This little trick, called brow tinting, is something you can actually do yourself, right from the comfort of your own place. It's a way to give your natural brow hairs a boost, making them appear fuller and more noticeable, which is pretty neat, you know?
For many people, the thought of skipping that daily brow routine is a pretty appealing one. The good news is that giving your brows a tint at home can be quite straightforward and, in many cases, rather gentle on your wallet too. We're talking about something that could cost you less than ten dollars to get started, which is a far cry from salon prices, honestly. This means you can get those lovely, full-looking brows without having to book an appointment or even leave your house, which is a huge plus, you might agree.
This article will walk you through everything you might want to know about how to tint your brows at home. We will go over what it involves, what you might need, and how to go about it so you can achieve those fuller, more striking brows you've been hoping for. We'll touch on how it can be a relatively simple and safe process for many people, helping you feel more confident about trying this beauty trick for yourself, too it's almost.
- Raquel Leviss Now
- What Is The Dog From The Proposal
- Doc On Fox True Story
- Lola Kelly Ripa Daughter
- Angelina Jolie Halloween
Table of Contents
- Brow Tinting at Home - Why It's a Great Idea
- What Exactly is Brow Tinting at Home?
- Getting Ready for Brow Tinting at Home
- Is Brow Tinting at Home Safe for Everyone?
- How to Do Your Brow Tinting at Home - A Step-by-Step Guide
- Keeping Your Brow Tinting at Home Looking Its Best
- Common Questions About Brow Tinting at Home
- Making Your Brow Tinting at Home Last
Brow Tinting at Home - Why It's a Great Idea
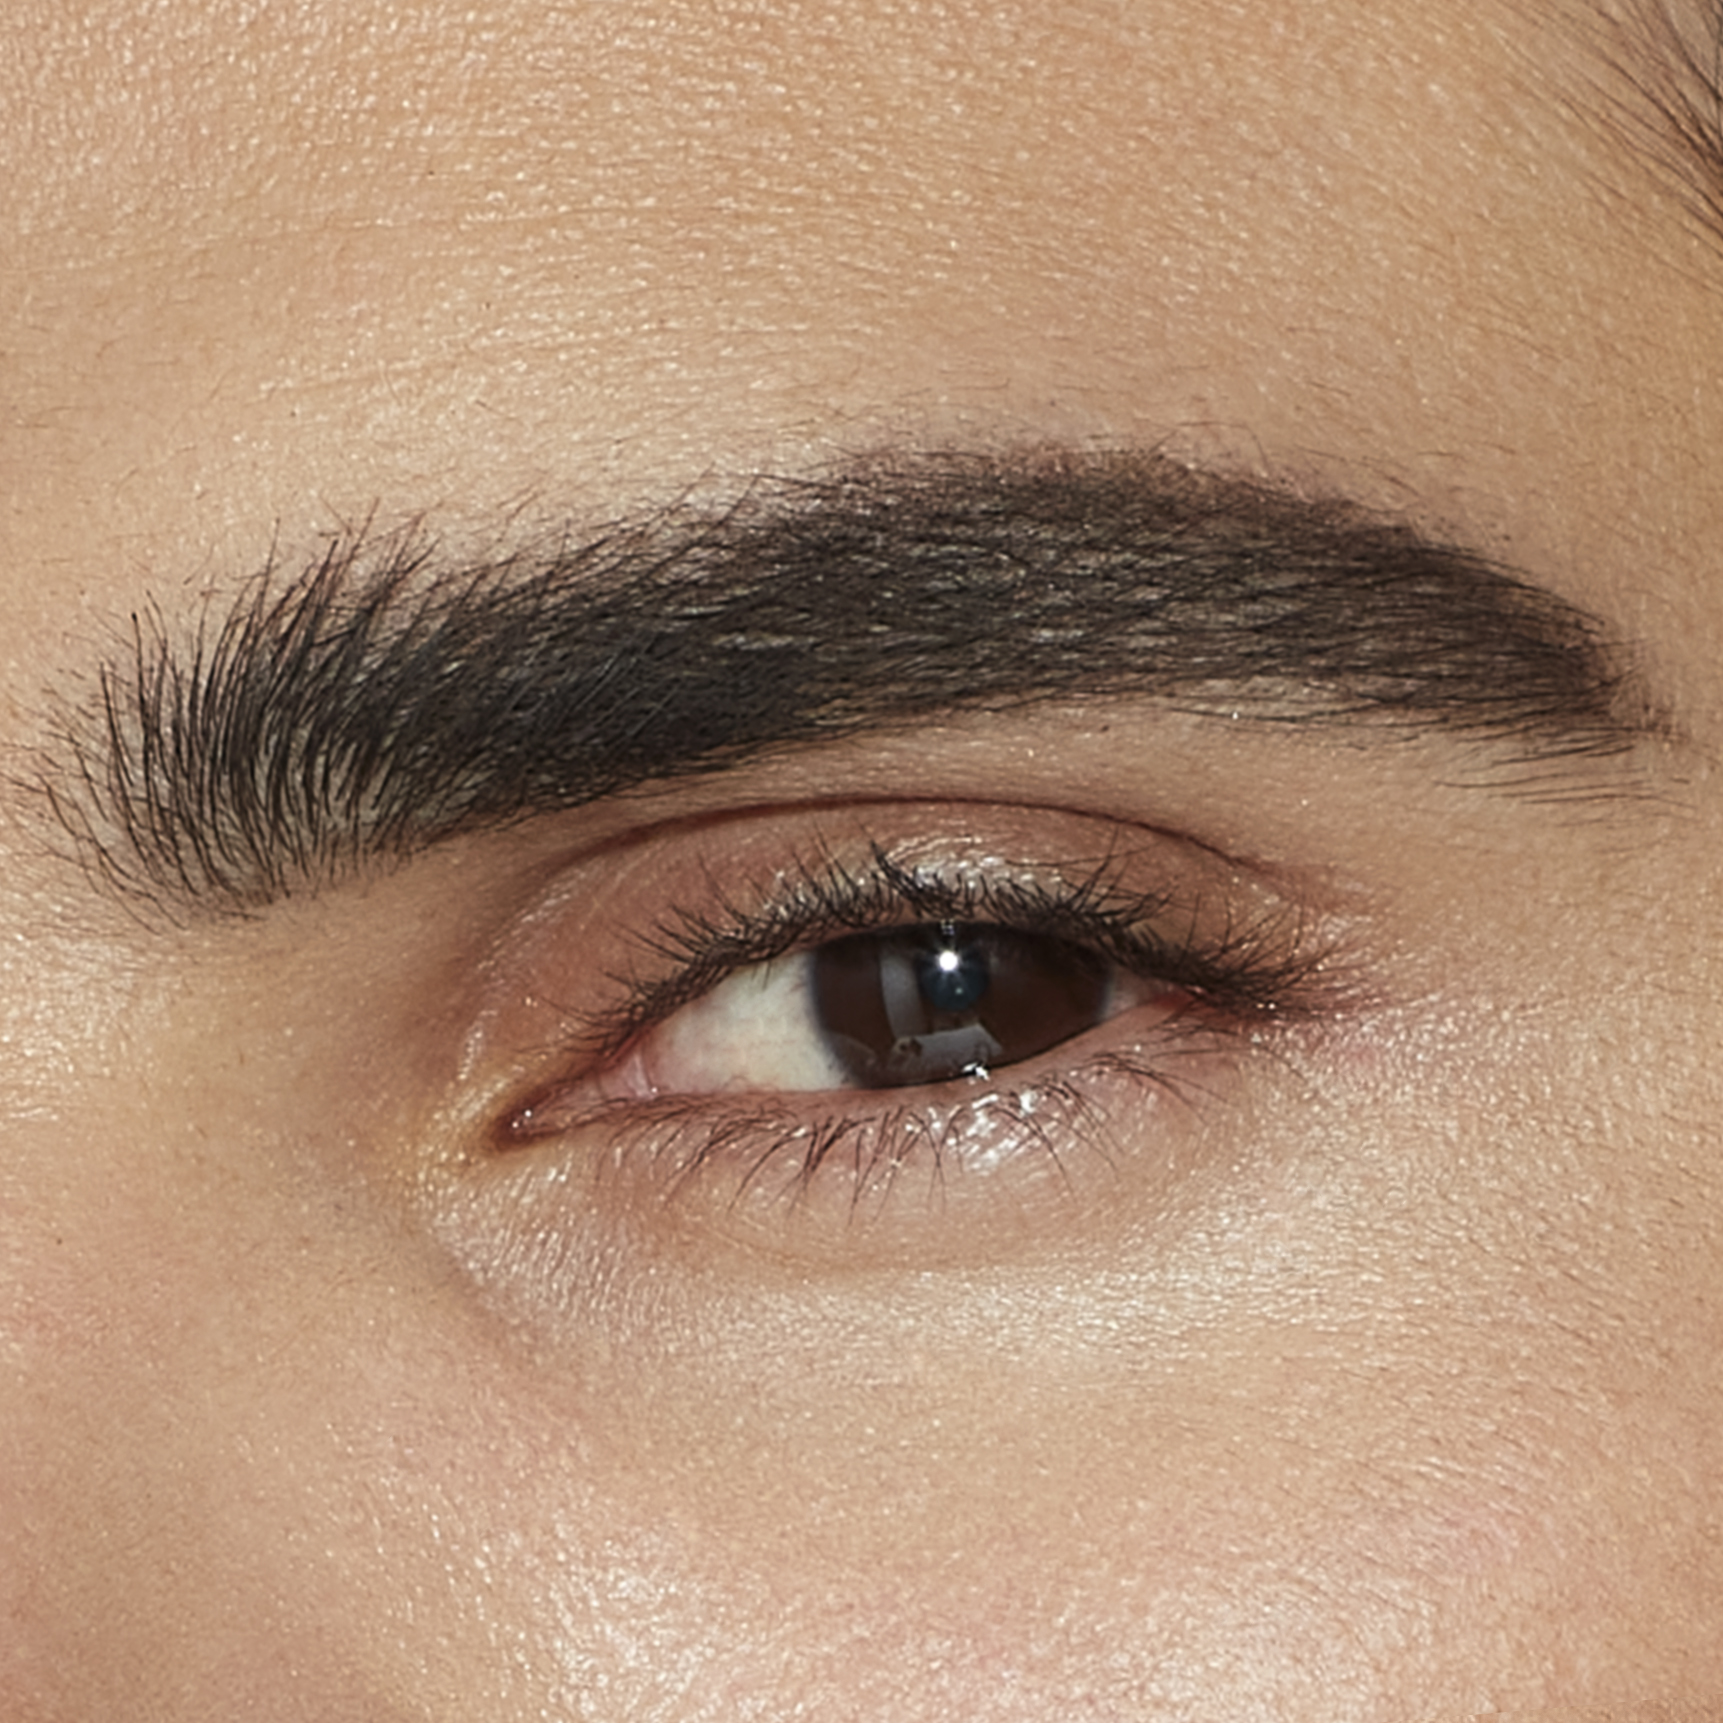
Many folks find themselves wishing for brows that have a bit more presence, something that frames their face just right without all the daily fuss. That's where the thought of brow tinting at home comes in, you know? It's a way to give your existing brow hairs a deeper, richer color, making them appear thicker and more defined. This can be especially good if your brow hairs are naturally light or a bit sparse, because the tint will catch even the tiniest, almost invisible hairs, giving the illusion of a much fuller shape, which is quite a difference, actually.
One of the biggest draws for doing your brow tinting at home is the sheer convenience. Think about it: no need to schedule an appointment, no travel time, and no waiting around in a salon. You can do it on your own schedule, perhaps while you're catching up on a show or just relaxing at home. This flexibility is really appealing for busy lives, and it saves you a good chunk of time, too, which is always a bonus, right?
Then there's the cost factor, which is pretty significant. Getting your brows tinted at a professional salon can add up over time, especially if you're doing it regularly. When you choose to do your brow tinting at home, you can often find kits for a very modest price, sometimes even under ten dollars. These kits usually contain enough product for several applications, meaning your initial purchase goes a long way, saving you quite a bit of money in the long run, as a matter of fact.
- Does Steve Kerr Have A Son
- Common Rapper And Jennifer Hudson
- River Robertson Now
- Did Shaq Have A Stroke
- Ashley Everett Husband
Beyond the practical benefits, there's a certain satisfaction that comes from doing something like this for yourself. It’s a little act of self-care that gives you a noticeable result. Plus, having those fuller, more distinct brows can really make your eyes pop and give your face a more polished look, even on days when you don't feel like putting on much other makeup. It's a subtle change that makes a rather big difference in how you present yourself, essentially.
What Exactly is Brow Tinting at Home?
So, what exactly are we talking about when we say "brow tinting at home"? Simply put, it's the process of applying a semi-permanent dye to your eyebrow hairs. This dye is made specifically for use on the delicate hairs around your eyes, and it comes in various shades to match different hair colors. The goal is to color the brow hairs themselves, not the skin underneath, though sometimes a little staining on the skin can happen temporarily, which typically fades pretty quickly, you know.
Unlike using an eyebrow pencil or powder, which only adds color to the surface of your hairs and skin each day, a tint actually changes the color of the hair strands. This means the color stays put for a period of time, usually a few weeks, before it gradually fades. It's a bit like getting your hair colored, but on a much smaller scale and with a product designed for your brows, which is quite convenient, honestly.
When you do brow tinting at home, you're essentially using a small kit that contains a dye and a developer, which are mixed together just before application. Some kits, like the Brow Code brow tint kit you might hear about, are designed to make this process as simple as possible for home users. The mixture is then carefully painted onto your brow hairs, left on for a short time, and then wiped away. The result is a darker, more defined brow that looks natural and lasts for weeks, pretty much.
The whole idea behind it is to give your brows a more "finished" appearance without the daily effort. If you have very light brow hairs, even if they're plentiful, they can seem almost invisible. Tinting them makes them visible, adding structure to your face. For those with sparse areas, tinting the finer, lighter hairs around those spots can make the entire brow look denser and more complete, which is a nice visual trick, you see.
Getting Ready for Brow Tinting at Home
Before you even think about applying any tint, there are a few important steps to prepare for brow tinting at home. First things first, you'll want to make sure your brows are clean and free of any makeup, oils, or lotions. A gentle cleanser will do the trick, and then make sure they are completely dry. Any residue could prevent the tint from sticking properly, and you want the best results, naturally.
Next, it's a good idea to protect the skin around your brows. You can use a barrier cream, like petroleum jelly, around the edges of where you want the tint to go. Be careful not to get any on the brow hairs themselves, as this will stop the tint from working on those spots. This little step helps prevent any unwanted staining on your skin, which is pretty helpful, you know.
You'll also want to gather all your supplies. Most brow tinting at home kits come with everything you need: the tint, the developer, and often a small mixing dish and applicator wand. You might also want some cotton swabs or pads, a timer, and perhaps a damp cloth nearby for any little clean-ups. Having everything ready before you start makes the process much smoother and less messy, which is good, really.
Picking the right shade is also a rather big part of getting ready. You usually want a shade that is one or two tones darker than your natural brow hair, or a shade that complements your hair color. Going too dark can look unnatural, especially if your hair is very light. If you're unsure, it's often better to start with a lighter shade, as you can always go a bit darker later if you wish. This thoughtful selection helps ensure a result you'll be happy with, basically.
Is Brow Tinting at Home Safe for Everyone?
When considering brow tinting at home, a really important question comes up: is it safe for everyone? The answer is that for most people, it can be a perfectly safe procedure when done correctly. However, there's a truly critical step that should never be skipped, and that's the patch test. This is where you apply a tiny bit of the mixed tint product to a small, hidden area of your skin, like behind your ear or on your inner arm, about 48 hours before you plan to tint your brows, just to see.
The reason for this patch test is to check for any allergic reactions. Even if a product is generally considered safe, some individuals can have sensitivities to certain ingredients. If you experience any redness, itching, swelling, or irritation in the test area, then that particular tint is not for you, and you should definitely not use it on your brows. Skipping this step could lead to an uncomfortable or even serious reaction around your eyes, which is obviously something to avoid, seriously.
People with certain skin conditions, very sensitive skin, or known allergies to hair dyes might find that brow tinting at home isn't the best option for them. If you have any open cuts, scratches, or skin irritations around your brow area, it's also best to wait until those have healed completely before applying any tint. Your skin needs to be in good condition for the tint to be applied safely and effectively, you know?
Also, it's worth remembering that the products are designed for brow hair, not for eyelashes. Never use brow tint on your eyelashes, as the formulations can be different and potentially harmful to your eyes. Always read the instructions that come with your specific brow tinting at home kit very carefully, and follow them precisely. They contain important safety information and application guidelines that are there to protect you, as a matter of fact.
How to Do Your Brow Tinting at Home - A Step-by-Step Guide
Once you've done your patch test and gathered everything, you're ready to start your brow tinting at home. The process itself is quite simple, but taking your time and being precise will give you the best results. First, mix the tint and developer according to the instructions in your kit. This usually involves combining a small amount of each in the mixing dish until you have a smooth, creamy consistency, which is pretty easy, you know.
Next, using the applicator wand or a small, angled brush, carefully apply the tint mixture to your brow hairs. Start from the inner part of your brow and work your way outwards, making sure to coat every single hair from root to tip. You want a good, even layer, but try not to get too much on the skin around your brows. Some people find it helpful to use a magnifying mirror for this step, just to be very accurate, you see.
Once both brows are covered, set your timer. The processing time can vary depending on the kit and how dark you want your brows to be, but it's usually somewhere between 5 to 15 minutes. It's often better to start with a shorter time, especially if it's your first time doing brow tinting at home, as you can always reapply for a little longer if they aren't dark enough. Over-processing can lead to brows that look too harsh or even damage the hairs, which you certainly don't want, right?
When the timer goes off, it's time to remove the tint. Gently wipe away the tint with a damp cotton pad or a wet cloth. Make sure to get all the product off your brows and the surrounding skin. You might need to rinse your brows lightly with water to ensure all residue is gone. Then, simply pat your brows dry, and you'll be able to see your newly tinted, fuller-looking brows, which is pretty exciting, honestly.
Keeping Your Brow Tinting at Home Looking Its Best
After you've successfully done your brow tinting at home, you'll want to take a few simple steps to help the color last as long as possible and keep your brows looking their best. The tint will naturally fade over time as your brow hairs grow and shed, but you can definitely extend its life with a little care. One of the main things to remember is to be gentle with your brows, you know.
Try to avoid harsh cleansers or exfoliants directly on your brow area, especially those containing oils or strong chemicals, as these can strip the color away more quickly. When you wash your face, gently cleanse around your brows rather than scrubbing them vigorously. This little adjustment can make a real difference in how long your tint stays vibrant, which is pretty good, really.
Also, prolonged exposure to water, like long swims or hot showers, can sometimes cause the tint to fade a bit faster. While you don't need to completely avoid water, being mindful of it can help. If you use brow gels or other styling products, opt for clear or tinted ones that are gentle and don't require heavy scrubbing to remove. The less friction and harsh chemicals your brows encounter, the better for the tint's longevity, essentially.
Sun exposure can also play a role in fading, just like it does with hair color. If you spend a lot of time outdoors, consider wearing a hat or using a brow product with SPF, if you can find one, to protect your tinted brows. By following these simple tips, you can enjoy your beautifully tinted brows for a longer period, making your brow tinting at home efforts truly worthwhile, as a matter of fact.
Common Questions About Brow Tinting at Home
Many people have questions when they first consider brow tinting at home, and that's totally normal. One common question is about how long the tint actually lasts. Generally, a brow tint will hold its color for about two to four weeks. This can depend on a few things, like how quickly your brow hairs grow, how often you wash your face, and the specific product you used. It fades gradually, so you won't suddenly wake up with no color at all, which is pretty reassuring, you know.
Another frequent inquiry is about what to do if the tint looks too dark after application. If your brows appear darker than you intended, don't panic. The color often softens a little after the first day or two, especially as any slight skin staining fades. You can also try gently washing your brows with a mild shampoo or a bit of clarifying shampoo, which might help lift some of the color. However, be gentle and don't overdo it, as you don't want to irritate your skin, you see.
People also wonder if brow tinting at home can damage their natural brow hairs. When done correctly and with products made for brows, tinting is generally not harmful to your hairs. The key is to follow the instructions precisely, especially regarding processing times, and to always do a patch test. Over-processing or using products not meant for brows could potentially cause some dryness or brittleness, but this is rare with proper use, honestly.
Finally, a lot of folks ask about the best brow makeup product to fill in sparse eyebrows if tinting isn't enough. While tinting makes your existing hairs more visible, it doesn't create new hairs. If you have truly sparse areas, you might still want to use a brow pencil, powder, or pomade to fill in those gaps for a truly full look. Tinting just gives you a great base to work from, making your daily makeup routine much quicker and easier, which is pretty handy, really.
Making Your Brow Tinting at Home Last
To really make your brow tinting at home results stretch as far as they can, there are a few simple habits you can pick up. Think of it like taking care of a fresh haircut; a little attention goes a long way. After the initial tint, try to keep your brows as dry as possible for the first 12-24 hours. This allows the color to fully settle into the hair shafts, making it more resistant to fading later on, you know.
When you cleanse your face, use a gentle touch around your brow area. Products with strong oils or alcohols can break down the tint more quickly, so opting for oil-free or very mild cleansers for your face is a good idea. Similarly, if you use facial serums or moisturizers, try to apply them around your brows rather than directly on them. This small change helps protect the tint from being prematurely stripped away, which is pretty helpful, actually.
Consider adding a clear brow gel to your daily routine. Not only can this help shape your brows, but some clear gels can also create a light protective barrier over the tinted hairs, helping to shield them from environmental factors and daily wear. It’s a bit like putting a topcoat on your nail polish; it just adds an extra layer of defense, which can be pretty effective, you see.
Finally, remember that the tint will naturally fade as your brow hairs grow out and new, un-tinted hairs replace them. When you notice the color starting to lighten, you can simply repeat the brow tinting at home process. Many people find that a touch-up every three to four weeks keeps their brows looking consistently good. It becomes a regular part of their beauty routine, offering a lasting solution to the daily brow pencil struggle, pretty much.
- Four Ingredients For Natural Mounjaro
- Camila Cabello Brunette
- Claire Dutton In 1883
- Fbi Most Wanted Cancelled
- Common Rapper And Jennifer Hudson