Imagine having a little piece of a garden right on your fingertips, bringing a fresh, happy feeling to your everyday. It's that wonderful thought of having delicate blossoms, those pretty natural creations, adorning your nails. So, many people find a lot of joy in making their hands look like a tiny canvas for nature's prettiest displays. This kind of personal touch can really brighten your day, offering a cheerful reminder of the outdoors, even when you are inside. It's a way to express a bit of your personality, too, with just a little effort and some creative flair.
Perhaps you think creating such lovely little pictures on your nails sounds like something only a professional could manage, or that it takes hours of very precise work. Well, that's not quite the case, actually. The good news is that getting a charming flower look on your nails doesn't have to be a complicated task at all. There are plenty of straightforward methods and simple tricks that let you bring these natural beauties to life right on your own hands, without needing a lot of special training or fancy tools. You can make your nails look quite lovely with just a few basic items and some patience.
This article will show you how to get started with flower easy nail art, making it accessible for anyone who wants to add a touch of floral charm to their look. We'll explore some simple ways to put those pretty petal shapes onto your nails, looking at the very basic ideas behind many of nature's beautiful blooms. You'll find out that even with a simple dot or a gentle stroke, you can create something truly delightful. It's about finding inspiration in the natural world, perhaps from pictures of various plant types, and translating that simple beauty onto your nails.
- Micah Parsons Kids
- Did Ellen Degeneres Break Up With Portia
- Suki Pregnant
- Did Shaq Have A Stroke
- Corey And Leah Now
Table of Contents
- The Appeal of Petal Patterns on Nails
- What makes flower easy nail art so popular?
- Gathering Your Bits for Flower Easy Nail Art
- Do you need special supplies for flower easy nail art?
- Creating Simple Flower Designs on Your Nails
- How can you make flower easy nail art look just right?
- Looking After Your Petal Nail Art
- Where can you find more flower easy nail art ideas?
The Appeal of Petal Patterns on Nails
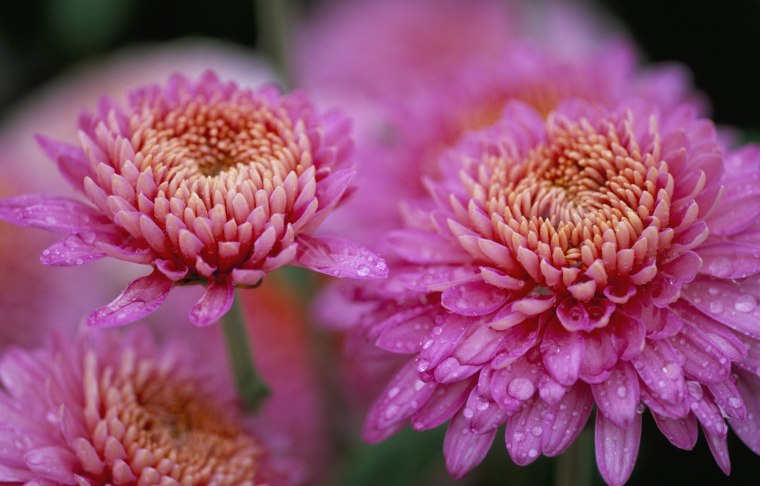
There's something truly special about seeing a flower, isn't there? Those delicate petals, the way they arrange themselves, and the bright colors they show off. It's a natural wonder that has captivated people for a very long time. When you bring that kind of beauty to your nails, you are, in a way, carrying a small piece of that natural wonder with you. This can be a real mood lifter, giving you a little burst of happiness every time you catch a glimpse of your hands. It’s a way to keep a bit of spring or summer with you, no matter the actual season outside.
Many folks appreciate the way these designs can make their hands feel more put together, yet still very playful. It's a chance to add a little flourish to your personal look, something that feels a bit more interesting than a plain coat of color. You know, it's like choosing a favorite bloom from a garden and deciding to display it in a new and unexpected spot. This kind of nail decoration can really speak to a love for nature, or just a desire for something pretty and cheerful. It's a simple pleasure, really, that has a lot of charm.
The sheer variety of flowers in the world means there are so many different shapes and color combinations to draw inspiration from. We hear about how many hundreds of thousands of distinct types of flowers exist, each with its own particular way of showing off its petals and inner parts. This vast array of natural designs means you are never short of ideas for your nails. You could pick a daisy for its simple, open face, or a rose for its layered, soft appearance. There are, for example, simple blooms that have petals arranged in simple circles, a lot like how some flowers have their parts set in four circular levels. This makes it quite simple to create a recognizable flower shape, even with very basic tools.
- Brooke Shields Grandchildren
- Ashley Everett Husband
- Tyrese Haliburton Mother
- Four Ingredients For Natural Mounjaro
- Florida Teens
What makes flower easy nail art so popular?
The appeal of flower easy nail art really comes down to a few straightforward points. First off, it offers a look that feels both classic and fresh all at once. Flowers have been a symbol of beauty for centuries, and putting them on your nails keeps that tradition alive in a modern way. It's a way to feel connected to nature, even if you are just sitting at your desk. You might find that looking at your hands with these pretty designs just makes you feel a little more cheerful, a little more put together, you know?
Another big reason is how achievable it is for almost anyone. You don't need to be a professional artist or have a lot of fancy equipment to get a good result. With just a few basic polishes and some simple tools, like a toothpick or a bobby pin, you can create some really charming designs. This accessibility means that more people can give it a go, without feeling like they need to invest a lot of money or time. It’s a very satisfying feeling to look at your hands and know you made those pretty patterns yourself, honestly.
Plus, the designs themselves can be as simple or as detailed as you like. For flower easy nail art, we are often talking about designs that use just a few dots or strokes to form a petal shape, or maybe a tiny swirl for a leaf. This means you can get a lovely result quite quickly, which is perfect for those times when you want something pretty but don't have hours to spend. It’s a quick way to add a bit of joy to your look, and that’s pretty appealing to many, as a matter of fact. The wide variety of natural flower forms, some with a very simple structure like a central point and petals spreading out, lends itself perfectly to these quick, simple interpretations on a nail surface.
Gathering Your Bits for Flower Easy Nail Art
Before you begin putting those lovely little flowers onto your nails, it helps to have all your bits and pieces ready. You wouldn't start a baking project without all your ingredients, would you? So, think of this as gathering your nail art ingredients. The good news is, you probably have a lot of what you need already lying around your home. You don't need to go out and buy a whole new set of specialized items just to get started with some pretty flower easy nail art.
First up, you'll want some nail polish. You'll need at least two colors: one for the base of your nail, and another for the flower itself. A light color for the base, like a soft pink or a pale blue, often works well as a background for brighter flower colors. For the flower, you could pick a cheerful yellow, a pretty red, or a lovely white. You might also want a green for leaves, but that's entirely up to you. Having a clear top coat is also a really good idea, as it helps to protect your design and give it a nice, shiny finish. This is pretty much essential for making your art last.
For tools, you don't need anything fancy. A simple toothpick can be your best friend for making small dots or dragging tiny lines to form petals. A bobby pin, with its little rounded ends, can also be useful for slightly larger dots. Some people even use the end of a small paintbrush or a pencil with a dull tip. The idea is to find something that lets you pick up a tiny bit of polish and place it exactly where you want it. You could also use a very fine brush if you have one, but it's not strictly necessary for flower easy nail art. It's about being resourceful, you know?
Do you need special supplies for flower easy nail art?
The short answer is, not really, for flower easy nail art. While there are certainly many specialized tools and polishes available for nail art, you can absolutely create beautiful flower designs with very basic items. The key is to understand the simple shapes that make up a flower and how to recreate those with what you have. Think about how a daisy is just a center dot with petals radiating out, or how a rose can be suggested with a few swirls. These simple forms don't demand complex instruments.
For instance, you might see pictures of flowers, perhaps even lists of hundreds of flower types, and think about how varied they are. Yet, at their core, many have a central point and petals spreading outwards. This basic structure, which is somewhat like the central axis of a plant flower, can be made with a simple dotting tool or even a toothpick. You don't need a tiny, expensive brush to create a simple dot or a small line. A small bead of polish on the end of a toothpick can form a perfect petal shape, or a cluster of dots can become a tiny blossom.
So, instead of worrying about buying a whole kit, focus on what you can do with what's around. A regular nail polish brush can put down your base color. A toothpick can make your petals. A bobby pin can make slightly bigger dots for flower centers. You might even use a small piece of sponge for a textured background. The truth is, the creativity often comes from working with simple items and finding new ways to use them, which is a pretty cool thing, actually. You can often find a lot of inspiration by just looking at how real flowers are put together, like those pictures of common favorites such as roses, and simplifying their appearance.
Creating Simple Flower Designs on Your Nails
Now for the fun part: putting those flower shapes onto your nails! The trick to flower easy nail art is to keep the designs simple and not try to recreate every single detail of a real flower. We're aiming for a suggestion of a flower, a pretty little symbol, rather than a botanical drawing. This approach makes it much more manageable and less likely to cause frustration. You know, sometimes less is more when it comes to small spaces like a fingernail.
One of the simplest flower designs involves just dots. Start by painting your nails with your chosen base color and let it dry completely. This is a very important step, as wet polish will just smudge. Once dry, pick a contrasting color for your flower. Dip your toothpick or dotting tool into the flower color, picking up just a small amount. Place one dot in the center of where you want your flower to be. Then, place four or five more dots around that central dot to form the petals. You can make them close together or slightly spaced out, depending on the look you prefer. This creates a sweet, simple bloom, very much like a basic blossom.
Another easy way to make a flower is with tiny strokes. Again, start with your dry base color. Using a fine brush or the very tip of a toothpick, pick up a tiny bit of your flower color. Gently make small, curved strokes radiating outwards from a central point. You could make three, four, or five strokes to form a petal shape. Once those are dry, you can add a tiny dot of a different color in the very center for a little detail. This method gives a slightly different feel, a bit more organic, in a way. You can experiment with the length and curve of your strokes to see what kind of flower shape you can create.
For a slightly more abstract flower, you can try a swirl technique. After your base is dry, put a small blob of your flower color onto your nail. Then, with a toothpick or a fine brush, gently swirl the polish around itself, creating a spiral shape. This can give the impression of a rose or a similar layered bloom without needing to paint individual petals. It's a very quick way to get a pretty effect, and it’s surprisingly effective for flower easy nail art. You might find this technique very satisfying, too, because it's quite forgiving.
Don't forget about adding leaves, if you wish. A simple green dot next to a flower, or a tiny V-shape, can suggest a leaf without much effort. You could even use a different shade of green for a bit of depth. The goal is to have fun and experiment. There are so many different types of flowers in the world, with all sorts of leaf shapes, so you can really play around with this part. You'll find that even the smallest addition can make your flower easy nail art look more complete.
How can you make flower easy nail art look just right?
Making your flower easy nail art look its best comes down to a few simple things. It's not about being perfect, but about paying a little attention to some key steps. One of the most important aspects is patience. You really do need to let each layer of polish dry completely before adding the next. If you try to paint a flower on a wet base, or add a top coat over wet flower details, everything will smudge and you'll have to start over. So, give each coat a good few minutes to set, you know, before moving on.
Another thing that helps is using good quality polish. You don't need the most expensive brands, but polish that applies smoothly and isn't too thick or too watery will make your job much easier. If your polish is a bit thick, you can add a drop or two of nail polish thinner (not remover!) to get it to a better consistency. This makes a big difference when you're trying to make small dots or lines for your flower easy nail art designs. It helps the polish flow just right from your tool.
Consider the size of your nails and the size of your flowers. If you have very small nails, one simple flower per nail might be enough. On longer nails, you might fit two or three smaller flowers, or one larger, more spread-out design. Don't try to cram too much onto one nail; sometimes a single, well-placed flower makes a stronger statement. This is pretty important for a clean look. Think about the overall balance, too. You don't want your nails to look too busy, but rather like a little piece of art.
Finally, always finish with a top coat. This step is like putting a protective shield over your flower easy nail art. It will make your design last longer, prevent chipping, and give it a lovely shine. A good top coat can also smooth out any slight bumps or unevenness from your flower design, making everything look more polished and professional. It’s a very simple step that really makes a big impact on the final appearance and durability of your pretty nail work.
Looking After Your Petal Nail Art
Once you've put in the effort to create your beautiful flower easy nail art, you'll want it to last as long as possible, won't you? Taking a few simple steps to care for your nails can help keep your designs looking fresh and pretty for days. It's a bit like caring for a real flower; you want to keep it from wilting too soon. A little bit of attention can go a long way in preserving your lovely work.
One of the best things you can do is apply an extra layer of top coat every couple of days. This refreshes the shine and adds another protective barrier against chips and scratches. It's a quick process that takes only a minute or two but can significantly extend the life of your nail art. This is especially true if you are doing things with your hands that might be a bit rough on your nails, like washing dishes or typing a lot. A fresh top coat really helps to seal everything in, you know.
Be mindful of how you use your hands. Try to avoid using your nails as tools, like for opening cans or scraping things. These actions can easily chip your polish and ruin your flower designs. When doing chores that involve water or harsh chemicals, like cleaning, it's a good idea to wear gloves. This protects both your nail polish and the skin on your hands. It’s just good practice for keeping your hands looking their best, honestly.
Keeping your nails and cuticles moisturized is also helpful. Dry nails can be more prone to breaking and chipping, which in turn affects your polish. Use a hand cream or cuticle oil regularly. Healthy nails provide a better base for your nail art, making it look better and last longer. A little bit of daily care can make a big difference in how long your flower easy nail art stays looking pretty. It's about nurturing your nails, just like you might nurture a plant to help it bloom.
Where can you find more flower easy nail art ideas?
The world is full of inspiration for flower easy nail art, if you just know where to look. Since there are so many different kinds of flowers out there, literally hundreds of thousands of distinct types, you'll never run out of new ideas to try. The beauty of these natural forms, whether they are common favorites like roses or something more unusual, can spark endless creative thoughts for your fingertips. You can find inspiration in places you might not expect, actually.
One excellent place to start is by simply looking at pictures of real flowers. You can find these online, in gardening books, or even just by observing the blooms in your own garden or local park. Pay attention to the shapes of the petals, how they are arranged around the center, and the different color combinations. Even a simple bloom with its distinct parts, much like the reproductive structures of plants, can give you ideas for a straightforward design. For example, a simple five-petal flower with a contrasting center is a very common and easy design to recreate.
Many websites and social media platforms are dedicated to nail art, and these can be a treasure trove of ideas. You can search for "flower nail art simple" or "easy floral designs" to find countless examples. People often share step-by-step guides or short videos that show exactly how to create different looks. This visual guidance can be incredibly helpful when you're trying to figure out how to translate a flower's appearance onto your nail. You might find a lot of inspiration from seeing how others have simplified complex flower shapes into easy-to-do patterns.
Consider also visiting local flower shops or looking at flower delivery services online, like those that offer to order flowers online or provide floral designers. While you might not be buying flowers for your nails, looking at their arrangements
- Doc On Fox True Story
- 911 Cast New Season
- Gael On Below Deck
- Who Was Saved In The Voice
- Tyrese Haliburton Mother